Getting into the Raw
Ever since I've had my nice Canon DSLR camera, all the stuff I've read has said that I really need to be shooting in RAW format, not JPEG. But I was reluctant for two reasons, one, because RAW format takes a lot of space, and, two, because there didn't seem to be any good packages in Linux for processing RAW images.
For the uninformed, the RAW format is a format on most DSLR cameras which saves much, MUCH more information of the original image, including a greater bit depth and color profile. However, this comes with a hefty price--over 8 MB required for each image.
But now that hard-drive space is so cheap, I figured it was time to stop being stingy with the gigabytes and start shooting like a pro.
Several times in the recent past, I've had a really magical shot, one of those shots where the boys weren't posing, but I captured the essence of the moment, and to have it ruined by forgetting to set the white-balance properly. And it's useless to then set the camera properly and go back to the boys and say, "OK, guys, do that again." The moment is lost.
And there is no post-processing fix for a poorly set white-balance when you're in JPEG format.
But in RAW, you can simply forget about white-balance while shooting and just adjust it afterwards.
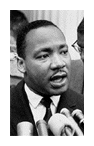
Take the following photograph for example. This one is typical. I will have come in from the outdoors, and forget to set the camera for the very yellow tungsten lights in our home. And everything comes out dripping in honey yellow.
And if you process it in JPEG format, trying to cool down all that yellow, you get WAY too much cyan in the white areas, and it just doesn't look real.
But in RAW format, you can adjust the white-balance, play with the curves, and even remove CCD noise before the image ever gets into a JPEG format for posting. I can even swap color profiles, which is a pretty advanced thing that I will probably never do. But I could.
So the after image, which was only post-processed, essentially restores a nice white-balance to the shot that was wrong in the first place.
Oh, and doing all this in Linux? Check out UFRaw and this brief tutorial on the Digital Photography School blog. The install is a breeze: